After months of waiting, it's finally here - Nintendo's new console, the Wii U. With it's unique tablet controller, five-player Mario game available at launch and an exclusive Lego game on the horizon, there's certainly plenty of new games to be excited about - but when you make the move from the Wii to Wii U, you won't need to leave your old games behind. With the console able to play (almost) every Wii game in the collection you've built up over the last six years, WiiWare games included, the only real barrier between you and the ability to carry on playing all your favourite games is Nintendo's somewhat long winded transfer process, that you'll have to go through to move your saves and WiiWare games from your Wii to Wii U. Luckily, we've faffed our way through the process so you don't have to - and here's our handy guide to ease you through the process.
Before we begin:
You will need:
- Your Wii and Wii U consoles, both connected to the internet
- An SD card
- A couple of Wii Remotes (or the patience to sync and re-sync a single one)
- Two sensor bars (or one that you'll need to swap between the Wii and Wii U)
Stuff that will be transferred:
- Downloaded WiiWare and Virtual Console games
- Save data - even ones like Super Smash Bros. Brawl which were locked to a console
- Any add-on content you've purchased - Just Dance songs and the like
- Wii Shop Channel purchase history and any remaining Wii Points
- Mii characters from the Mii Plaza
- Wi-Fi Connection-related settings
Things that won't get transferred:
- Your Wii system settings
- Pre-installed WiiWare or Virtual Console games
- Some software or save data - one of which appears to be WiiWare game Lost Winds, for some reason
- Software already present on both consoles
- Nintendo GameCube save data
- Limited time only downloadable content
- Mii Parade characters
- Extra Wii Channels - such as the BBC iPlayer, Everybody Votes Channel and Nintendo Channel
Before you start, it's probably a good idea to make sure everything you want to transfer across to your new console has been moved to the Wii console's system memory, and not left on an SD card. While it's not at all a requirement, the software stored in your Wii system memory will automatically be taken across in the process. If, like us, you've downloaded more than a few WiiWare games over the years, you may find you can't fit much of your collection onto the painfully small Wii System Memory - especially when you consider you need to keep 70 blocks free for the system transfer channel. But don't worry - even if you can't fit everything on the Wii's system memory, the transfer process will move the licenses for your games across from the Wii to the Wii U, meaning all you'll need to do is fire up the Wii Shop Channel afterwards, and download the remaining bits to your Wii U. Seeing as programs such as the iPlayer and Today & Tomorrow Channel don't shift over, you may be able to clear some extra room with a bit of re-jigging.
To move stuff between your Wii's System Memory and the SD card storage, you need to:
1. Press the 'Wii' button on the bottom left corner of the screen, then choose 'Data Management on the right.
2. You'll then have two options - one for Save Data and one for Wii Channels. Choose the one you want, and you'll be presented with a list of all the stuff saved on both your console and any SD cards you have inserted - the tabs at the top right hand corner let you switch between the 'Wii' memory and 'SD Card' portions.
3. To move things around, simply click on the icon you want to shift and choose 'Move' to swap it to the other memory - you can also 'Copy' things across or 'Erase' them completely from here, but you probably won't need to use those much in preparation for this guide. Some saves, like Super Smash Bros. Brawl, can't be moved or copied, but don't worry - they're already on the Wii System Memory and will get copied across to the Wii U as a matter of course.
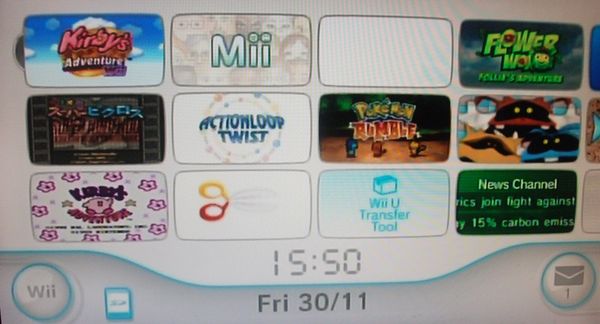
As a word of warning before we get cracking - once the data has been transferred, it'll be deleted from the original Wii console, and you'll be unable to transfer it back again. This is a one way process, and you can't choose what you want to take over, or leave behind. It also goes without saying that you should never switch your console off while your transfer is in progress, or you may end up corrupting your games or saves.
Part 1: The Wii U
1. On your Wii U console, select the Wii Menu option from the main menu (if you haven't already, you'll need to sync a Wii Remote to your Wii U console, which means pressing the red button on the front of your console, then taking off your Wii Remote's battery cover and pressing the little red button). Once in the Wii menu, start up the Wii System Transfer application, and after clicking on the 'Download' button on the bottom right, you'll be taken to the Wii Shop Channel where you need to download the Wii U Transfer Tool - click through a bunch of 'Yes', 'OK' and 'Continue' buttons and it'll download to your Wii U system, ready for you to transfer all your stuff in the next stage. Once the download has finished, return to the Wii Menu.
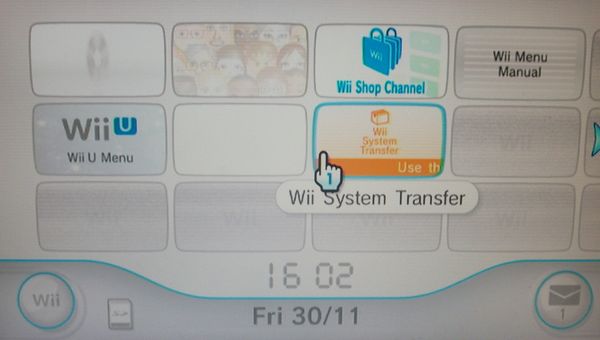
2. On your Wii Menu, you should now see the Wii System Transfer channel, complete with Pikmin carrying boxes in its animation. Start up the channel, clicking 'Next' through the explanation screens (it may be worth reading them, although at 8 pages long we won't judge you for skipping). When you're ready to proceed, and everything is in place as described at the start of this article, press the big blue start button, followed by 'Yes'. Press 'Yes' on the following screen, and your console will verify it can connect to the internet.
3. Now comes the serious part - it's time to insert your SD card into the SD slot on the front of the Wii U console (under the flap to the right of the red sync button), making sure to push it until it clicks in. Once inserted, click the 'Next' button, wait for it to verify your SD card and then click 'Next' and it'll start creating "Data for the system transfer". It should only take a split second to complete, which made us think "is that it?", but there is another step - click 'Next' and it'll write data to the SD card, this time taking a bit longer to complete. Once finished you'll get a screen saying that the preparations on the Wii U are complete, and you can return to the Wii Menu, meaning it's time to swap over to your Wii as we prepare for part 2...
Part 2: The Wii
1. Switch to your old Wii console, head into the Wii Shop Channel and download the Wii U Transfer Tool from the Channels section of the shop. Start up the Wii Shop Channel, choose 'Start Shopping', then pick 'Wii Channels' and the Wii U Transfer Tool should be at the top of the list - click through each 'Yes' to confirm, making sure you choose to save it to the System Memory rather than the SD Card, and it should start downloading, with the usual Mario running animation. Once it's completed, return to the Wii Menu.
2. For the second time today, head into the Wii U Transfer Tool Channel. Click 'Yes' to confirm your body is ready for the transfer, pick 'Yes' again for it to check your internet is ready, and wait for it to perform it's internet connection test. Now you need to remove your SD card from your Wii U console and pop it into your Wii, in the flap just below the reset button (assuming you have an old style upright console). Make sure it's clicked in and choose 'Next' - it'll load, read and write data from the SD card and retrieve some data from the internet, but it'll be over fairly quickly. The reason? We're not in business quite yet.
3. You see, Nanny Nintendo wants to hold our hand a bit more, giving us yet another lowdown on the process, running through which bits are moving and which will be left behind (bye bye iPlayer *sniff*). When you're ready, take a deep breath and hit the blue 'Transfer' button - and now we play the waiting game. While the program transfers your data to your SD card, you'll get a cute animation of little Pikmin carrying your purchases, complete with a ticker-tape across the top telling you what's being moved now and a percentage complete in the bottom corner. Don't worry if it seems to take a fair while, particularly if you've filled your console to bursting point like us - this is the main, and most time-consuming, part of the whole process. Besides; you can always play on your shiny new Wii U for a bit if you like. Once everything's been hauled over, it's time for the final leg of the process - which means heading back to your Wii U.
In the absence of any useful pictures for this part of the process, here's one from one of our most anticipated Wii U games - Lego City Undercover.
Part 3: The Wii U. Again.
1. Make sure your SD card isn't in the Wii U, and load up the Wii System Transfer application for a third time under the Wii Menu section of the Wii U. You'll be informed that a system transfer is still in progress - you want to click 'Yes' to continue the process where we left off, and like before, it'll test the internet connection. When it's finished doing that, you'll be prompted to insert your SD Card and click 'Next' - if you've put your SD card in before this point, it will (most likely) fail and give you a heart attack, but you can fix than by taking the SD card out and re-inserting it. Happy to proceed, the program will then begin loading data from the SD card, which, at least for us, takes quite a while, making you think that they've seriously skimped on the shifting animation this time. But it turns out that wasn't the main event, as the next screen asks if you're ready to transfer your stuff across - click the button marked 'Transfer' and the rocket baring your Wii bits and bobs will arrive, ready to be unpacked by a few helpful hands...
2. All you have to do now is wait for the transfer to complete - it'll probably take a similar length of time as it took to move them from the Wii onto the SD card, so don't worry if it seems to be taking an awfully long time to get anywhere. When it's finished, the program will do its best to give you a heart attack, by telling you it's "Deleted System Transfer data" - but don't worry, it hasn't gone horribly wrong; all it means is that it's cleared off your SD card for you. Just click 'Next', and it'll give you a run down of what it's moved - how many Wii Points have been transferred (if any), any Mii characters that have been moved over, and which saves and games have made the journey - click through all the 'Next' buttons and you'll get the option to return to the Wii Menu.
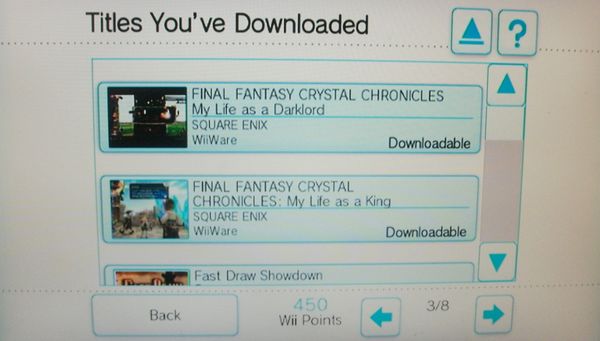
3. Assuming you managed to cram all your important stuff onto the Wii system memory, your journey ends here - with the process now complete, you're free to enjoy all the Wii and WiiWare games you enjoyed before, only this time through your new console. If, however, like us, you downloaded more than a handful of things, there's one final step to complete - one that may turn out to be more time-consuming than all the previous steps put together. You see, as the System Transfer only shifts across the stuff you can fit on the Wii's system memory, any games you couldn't cram in won't have made the move. Luckily, though, their 'licenses' will, which means all you have to do is head back into the Wii Shop Channel, click on 'Start Shopping' and then 'Titles You've Downloaded' to see your full list of purchases, which can now be redownloaded onto your Wii U. Once you've downloaded all your remaining games (and in our case, it's going to take quite a while), you're sorted!
---------
So there you have it - Nintendo's rather long-winded method of transferring your games, saves and more to your new console explained. Even thought it had some rather awesome transfer screens, we're glad we'll only have to do it once - and we hope our guide helped smooth the process for you.


