
With news coming out this week that already, Kinect has sold an impressive 2.5 million units, it seems likely that on Christmas morning, thousands of people around the world will be waking up to find they've been bought a Kinect of their own. Being the helpful folks that we are, we thought we'd put together a guide that shows you exactly how you set Kinect up, telling you what comes in the box, where you should put it, and a whole host of other tips to make the most out of your brand new purchase.
What do I need?
To actually use Kinect, you'll need three things - an Xbox 360, a TV, and plenty of room. Whether you have an old, curvey Xbox 360 or a new, angular, quieter one doesn't matter, as both are fully compatible with the Kinect. The biggest requirement, however, is room. Although the box dodges the question, Kinect absolutely needs a minumum of 6ft between you and it in order to work. Get any closer, and most games will refuse to even play. If you want to play any games in two player, you'll need to stand between 8-10ft away from the sensor - which can be quite a feat, as it was for us.
How much room?
We initially tried to set the sensor up upstairs, but with only five foot between the TV and us (and a sofa pushed against a wall behind us, so we couldn't go any further back), we literally could not use the sensor. Kinect Adventures, which comes bundled with the sensor, actually refused to play, because we were less than 6ft away, encouraging us to stand back if we wanted to play. What, through my wall?
Moving downstairs, we had a similar problem, and had to completely rearrange our living room in order to fit it in. By moving the two coffee tables, we just about managed to fit it in. It's hard to overestimate just how important distance is to Kinect. Because it tracks your whole body, it needs to be able to see your whole body, hence the distance requirement. While younger children can stand closer (as they're smaller, the camera will need less distance), grown ups may find themselves having to completely rearrange their living room whenever they want to play. In America, it's much less of a problem, as huge houses and open plan living rooms are the norm. In the UK, however, where the average living room is a between ten to eleven foot wide - with some new build houses being less than ten, you've got something more of a problem if you watch your TV across the narrowest part of the room. Before you invest, we'd strongly advise getting the tape measure out, and also considering what you want - if it's a multiplayer experience you're after, you'd best get arranging your furniture until you've got 8 to 10ft of uninterrupted (that means no coffee tables, toys, chairs, or cats) between you, and wherever your sensor's going to go!
Of course, it's not just the distance from the sensor that's important, as Kinect needs width, too, with between three and six foot the optimal amount of space you'll have to clear.
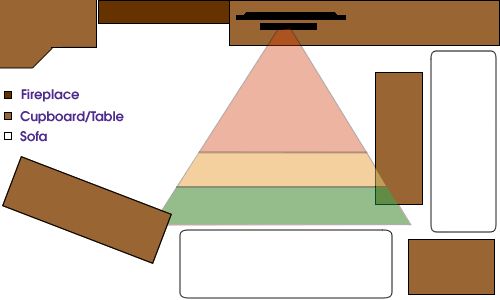
As our professionally drawn image shows, having rearranged our living room, we can play Kinect! Just...
What's in the box?
In the box, you'll find:
- A power lead
- A USB lead, with special Kinect fitting for new Xbox 360s
- A Kinect sensor (hopefully)
- A copy of Kinect Adventures
- A bunch of instruction manuals
Setting up the unit, physically, is fairly straightforward - once you've made sure you've cleared enough room to use it, simply place Kinect either in front of, or on top of your TV (if you've bought a special Kinect TV stand), between two to four foot off the ground, and plug it in. If you've got a new, angular Xbox 360 all you have to do is plug Kinect straight into the special Kinect port on the back, and you'll be good to go - if you've got an older, curvier model, you'll have to pop the Kinect adaptor off the end of the USB lead, plug the USB into a USB port on the Xbox 360, and plug Kinect into a mains power supply as well.
What next?
After you've done that, and switched your Xbox on, you'll be prompted to either connect (not Kinect) to the internet, or insert the disk that came with Kinect (although it isn't very clear, it's referring to Kinect Adventures here). If it's at all possible, we'd encourage you to connect to the internet, as, as far as we can tell, the version of the Kinect setup that comes on Kinect Adventures disk is broken. At least, ours was. All that happened was, when we were trying to configure the microphone, Kinect simply couldn't hear the TV - even on the wide range of volumes we tried it on, from hardly audible, to ear drum shatteringly loud. If we didn't have an internet connection, and only had Kinect Adventures, that means we wouldn't be able to set Kinect up properly - although other people have reported the setup working fine without being connected.
For those of us who do have internet connections (or simply don't care about the microphone functions), here's what you'll be greeted with.
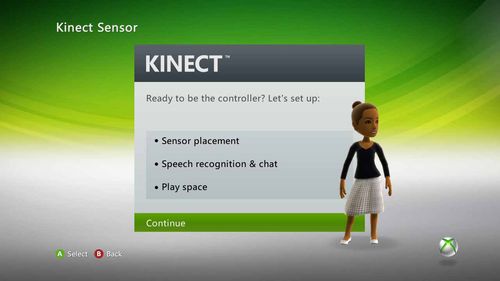
Ready to be the controller? Do you really need to ask? OK - press A, let's get going!
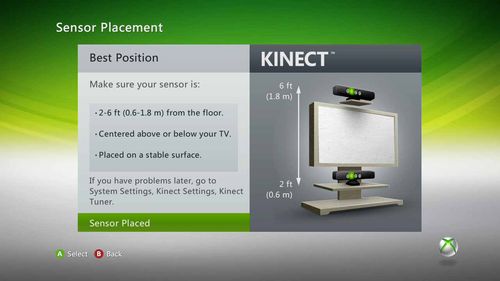
Helpfully, the Xbox then gives you some idea of the best place to put Kinect, which, unsurprisingly, is either in front of, or on top of your TV (it wouldn't work that well behind it). The height is important, as Kinect will need you to stand slightly less away from it if it's positioned above your TV. Whatever you do (unless you have a bulky CRT TV), don't try and balance Kinect on top of your TV - even using some bluetack. As a heavy, large, and most importantly, moving piece of machinery, it'll be prone to sliding off, so if you want to put it above your TV, you'll need a Kinect stand, which retail for between £30 to £40 for what's essentially a bit of plastic.
Microphone calibration
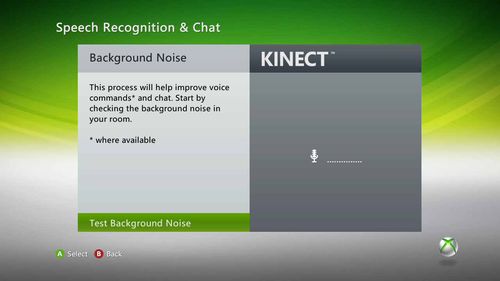
If you don't have an internet connection, this is where the Kinect set up fails. The first thing Kinect will try to do is to configure the multitude of microphones the sensor sports internally. In order to do this, first, it must test the background levels in the room, so you'll need to press A to begin the test, and put your fingers on your lips! Then, in order to test how well the microphones pick up sound, the console will play a few clips of music through the speakers in the TV. If you're using Kinect Adventures to set your console up, this is where it'll fail - but, if you've connected to the internet, you should get through it without problem. If it does fail, and you are connected to the internet, try turning your volume up, or down. If not, you may have to move your Kinect sensor. If all else fails, you may have to phone Microsoft and ask them.
After that, the sensor goes through a very similar test, where it plays some more musical clips, and tries to recognise where they're coming from. All you need to do is keep quiet, and press A when prompted, as Kinect should get through all the tests no problem.
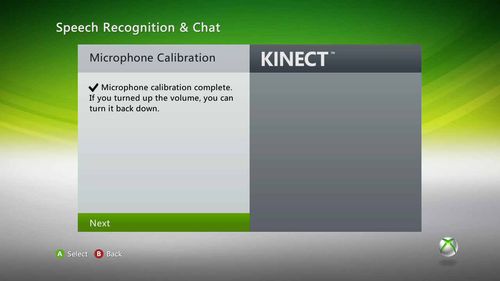
Kinect sensor setting up
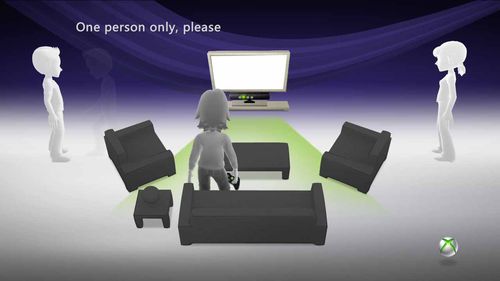
Seemingly, Microsoft's aware of what the average living room looks like. Kind of begs the question why they made the sensor require so much room, then.
Now, things start to get a bit more fancy. With the audio, and positioning already configured, it's time to start the nitty gritty of setting up Kinect - and that involves making it see you. After presenting you with a picture of what your living room probably looks like, with clutter, tables, and chairs all around, it'll show you how you have to move everything out of Kinect's line of site. You'll need a complete, uninterrupted path between you and Kinect in order for it to be able to see your whole body.
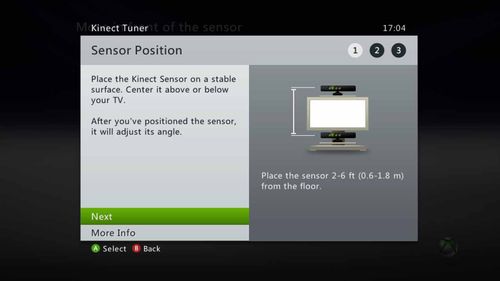
If you didn't see it the first time, the setup screen first tells you to put Kinect either above, or below your TV, which it most likely already is. Press A, and the sensor will whirr into action, as it moves up and down to scan your living room, trying to find the best angle. This should hopefully only take a few seconds, then you'll be presented with this:
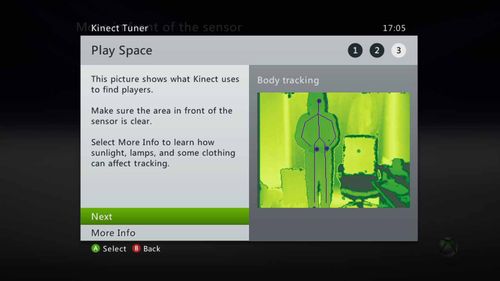
Here, you see exactly what Kinect sees using its infra red tracking. It picks out what it believes to be you, and draws a stick man over the top of it, showing you where it thinks your arms and legs are going. Just by moving around on this screen, you'll see how accurate Kinect mostly is - although there were a few times when it decided Sarah's hair was actually her arms and legs. Once you've clicked through these screens, and read the extra info pane, it's time to get started.
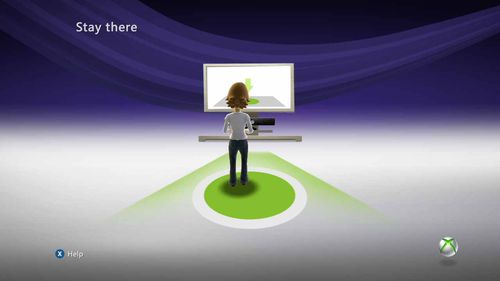
All you have to do is stand in the circle. Unfortunately for us, in the first room we tried to set Kinect up in, we couldn't even manage that, but after moving the sensor downstairs we were good to go. Stand in the circle, wait for it to recognise you, and wave at Kinect to get going.
So, there you have it! While it may seem a bit off a faff (and, truth be told, it is), if you keep Kinect in the same place, hopefully, you'll only have to do it once. If you ever want to access the setup again, and see exactly what Kinect's seeing, all you have to do is press the Y button in most games (or back in some), and you'll bring up the setup screen, where you can tweak it to your heart's content.
If you have the room, setting up Kinect is probably going to be a lot more straightforward that in was for us - but please, before you buy, make absolutely 100% sure you have enough room to use the sensor. If you don't, all you'll end up with is a headache, and a hole where £130 used to be in your pocket.
So have fun, and good luck setting up your new Kinect sensor! We hope this guide has been of some use!


