Prop goes the weasel
So, we've done some painting, let's crack on with decorating the island with some props - or, in more relatable terms, items and objects that we can put in our game. Press A to bring up the side menu bar, and move down to the Prop toolset option, selecting the first highlighted choice, Add & Edit Props, by pressing the A button. This will bring up the Prop tool's palette menu, which will take the place of the Paint palette menu at the bottom of the screen.
The Add & Edit Props tool allows you to add and tweak the props and items you want to place in your game, helping your game feel more like, well, a game, rather than just a rather pretty outcrop. Before we move on, let's move our character to the start of our path so he'll be ready to set off on his quest. To do this, having selected Add & Edit Props with the A button, hover the cursor (now a small blue crosshair-like circle... Project Spark certainly does like to use a variety of different sizes/colours of cursors) over him, and press the right trigger. Now, moving the left stick, you can move your character to your desired placement spot - let's stick him at the far left of our path; we'll put some more items at the right end of the path, along with our goal.
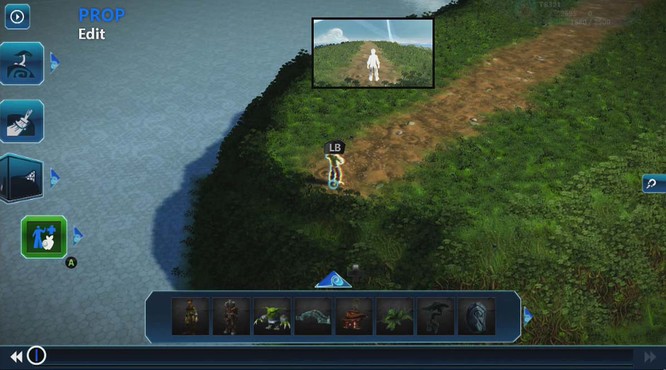
Placing the character on the path. Note how the preview window at the top of the screen changes when you press B to place your character. This gives you an idea of how the game will look to players when they start playing.
Once you're happy with your character's placement, first press the left trigger to snap your character to your freshly painted ground - this means that your hero won't end up stuck in the ground when you start to play, which, let's face it, wouldn't be an awful lot of fun! Snapping your character to a surface, or any other object or prop, is just an easy way of getting the game to automatically attach the item you want to the desired surface you're wanting them to stand on, in a single neat button press.
Once you've pressed left trigger to snap your character, press the B button to set the new position and drop your character into place.
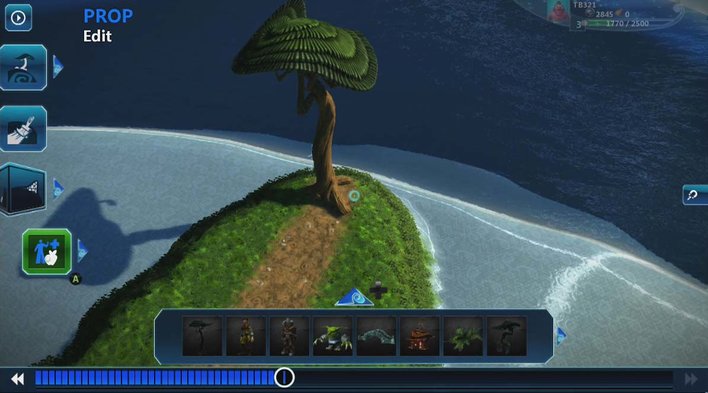
So our character is in place ready to start the game - but first, let's add in a nice big tree at the other end of our island as some pleasant scenery. We're still in the Add & Edit Props tool, so all we have to do is press up on the d-pad to open up the prop gallery. The prop palette just displays a small selection of the most commonly used props here, not the full catalogue of goodies on offer in the gallery, so we'll show you how to search in the full prop gallery screen
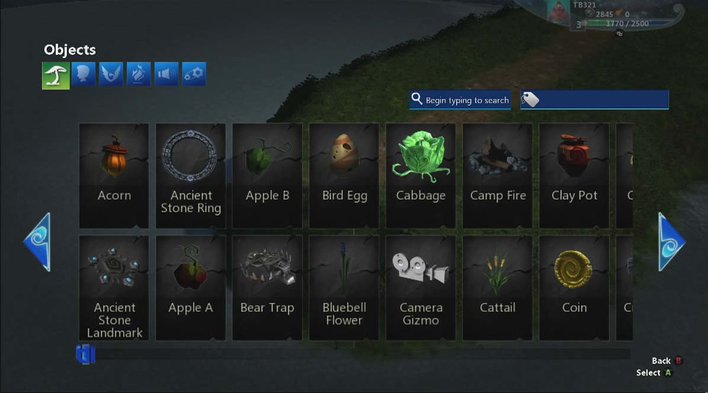
The Add & Edit Props gallery selection screen. Note that the top left green highlighted box shows that we're currently looking at a selection of props in the objects category.
Here, we can select objects, characters, effects and lots of other fascinating things to put in our game. All the props are divided up into different categories - you'll see each category is highlighted in the top left corner with a symbol and matching text. You can cycle through the different categories of props by pressing up on the d-pad/left stick to move your cursor up there, using the A button to select the category you want.
As mentioned, it's a tree we're looking for, which is in the object section, so as it's the default category that loads up, you can simply scroll through all the choices by pressing/holding right on the d-pad/left stick. However, as there's a lot of objects to choose from, that would take forever, so let's do something quicker! See the blue box near the top right corner with a magnifying glass in it? Highlight that and press the A button, then type 'tree' using the virtual keyboard before pressing the menu button (the small black button with three lines across it) on your controller to begin the search.
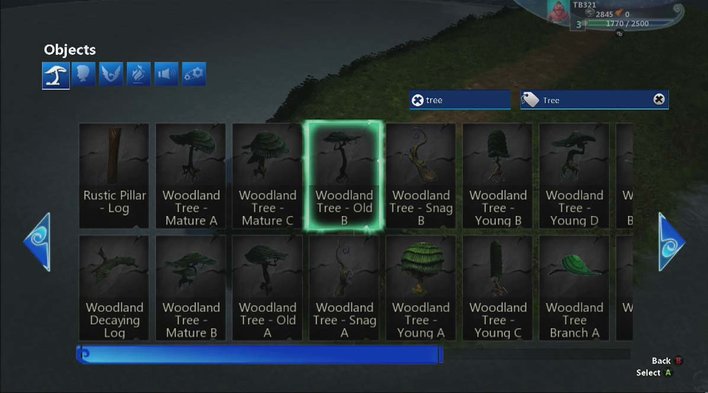
We'll use this tree, 'Woodland Tree - Old B' as a prop in our game.
This brings up all the objects that have been tagged as trees by the game - and as you can see, there's a lot of them. Let's go with the majestic 'Woodland Tree - Old B' as the tree of choice for our game, which can be seen below in the screen above. Move the cursor over the tree and select it by pressing the A button.
You'll now see a massive blue outline of the tree in the game. Looks like we've picked a particularly epic tree! Using the left stick, move the tree to where you want to place it in the game - for our example, let's put it at the far right of your island. We place the tree in a very similar manner to the way we placed our character - once you're happy with its position, press the left trigger to snap the tree to the ground (the roots will disappear and be below the ground, but much like with trees in real life, that's normal), but this time, press right trigger to put the tree into the game instead of the B button. The reason for this is that pressing the right trigger creates a new object from the selected prop, for example the tree we've just placed, from scratch. When we placed our character on the path, he already was in the game to start with, so rather than making another character by pressing right trigger, we pressed the B button to just set his new position instead.
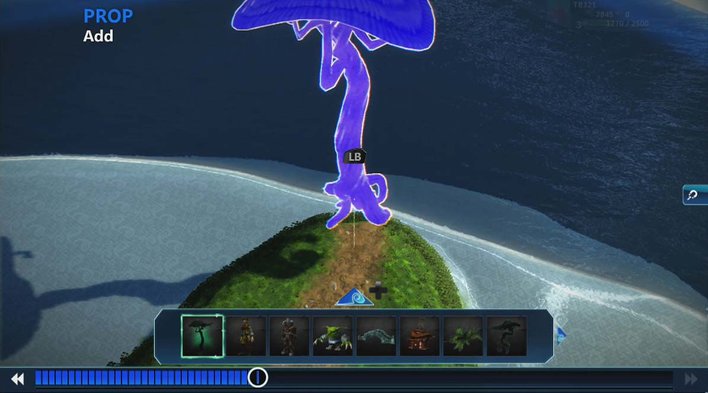
Move the tree to where you want it to go...

... press L to snap it to the ground...
...and press the right trigger to place it in the game. Voila! You've just planted your first tree!
Okay, so we've got a nice leafy tree in our game. Let's add a few more things to the game and then we can play it - we're nearly there now!