Have you ever wanted to build your very own game? If you've got an Xbox One or PC, then a great place to start taking those first few adventurous steps into the world of game design is a nifty little program called Project Spark. Developed by Team Dakota, Project Spark is the Microsoft equivalent of Little Big Planet, the highly-popular (and highly customisable) series of world-building Playstation games featuring the loveable Sackboy, that let you make your own level from scratch, and is easily one of the hidden gems on the Xbox One.
Giving you everything you need to not only make your own levels, but practically craft entire games using only a simple palette of tools, whether you want to recreate your favourite 2D or 3D platformer, or create your very own gaming masterpiece, Project Spark is a great place for budding young (and young at heart!) games developers to start tinkering. You can even upload your creations so others can play them, or download projects from some of the most creative minds in the world, before remixing it - the game's term for putting your own spin on other players' games and creations - to your heart's content.
First launched in beta in December of last year on PC, the game really gained momentum in March 2014 when it launched on Xbox One. At the time of writing, there are over 250,000 Project Spark players busily working away on over 37,000 different worlds! Although still in beta form on Microsoft's new shiny (and matt) black console, Project Spark has proven popular, even being used as a promotional tool for the metal band Linkin Park, who released an interactive playable game world for their single, Guilty All The Same, that players could download to their consoles play to remix.
However, every silver lining has a cloud (or something like that), and Project Spark is no different. While it's a fantastic creation tool, and, best of all, is free to download, it's also pretty heavy on the micro transactions, with a huge amount of extras features and items available for download at a cost. Still, if you know what you're doing, it's more than possible to create your very own game without spending a single penny - and this guide will show you how!
We're going to go through step-by-step how to make a simple 3D platforming game, with coins to collect and enemies to beat along the way to the goal.
Okay, so where to begin I hear you ask? To the main menu... and beyond!
A whole new world
Once you've started the game up, and the flashy introduction sequence has finished, you should be faced with a menu that looks like this:
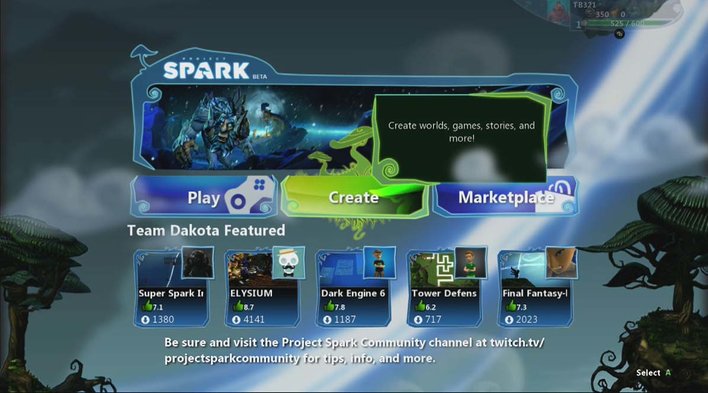
The main menu screen. Some of the fonts used in Project Spark are *tiny* on most TVs. Needs a patch.
Use the d-pad/left stick over the Create option and press A to select it. One thing to note here is that if this is your first time playing Project Spark, the menu items and your on-screen cursor may be faintly outlined and look like the display shown in figure 2 below:
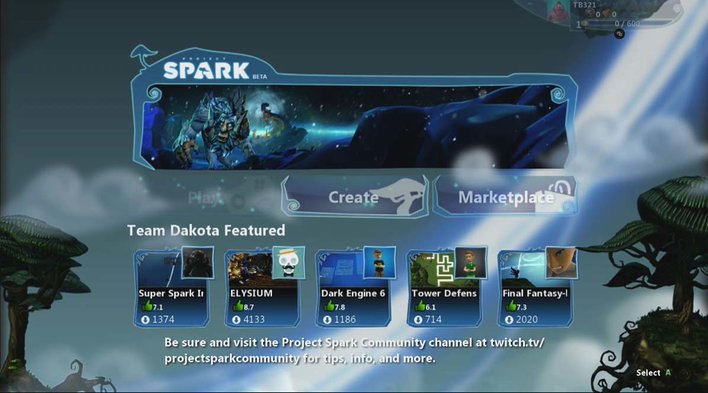
Some of the icons can be quite faint and translucent at first, but once selected they become solid and opaque like in the screen above.
If they are, don't worry, it doesn't mean you can't use them - it just means that you haven't 'activated' each option yet. All you have to do is move your (unhelpfully faint) cursor to your desired choice press the A button to activate it. The option you chose will change to a bright green colour, and a short verbal prompt from the in-game narrator will play. So if you can't see where your cursor bracket is at first, don't panic; press A and you'll be able to see it turn green on whichever options it's currently over.
Okay, so to recap, with the Create option highlighted, press the A button and you should now be whisked away to a screen that looks like this:
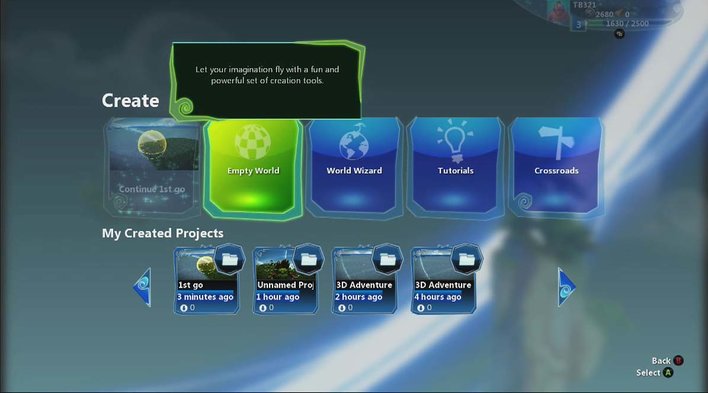
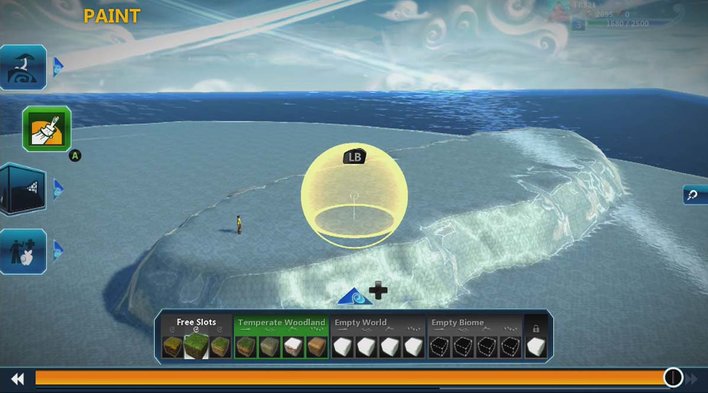
Move the cursor to the far left option, Empty World, and press A. This will generate a new world template for you to customise to your heart's content. You should now see a screen that looks like this, complete with a small chap in a yellow shirt.
This will be our playable character in the game, but before we get to him (we think we'll call him Bert), let's run through the basic cursor and camera controls, and two of the main creation tools. Don't worry, we doubt Bert's got anything better to do, so take your time!
Lights, camera, cursor!
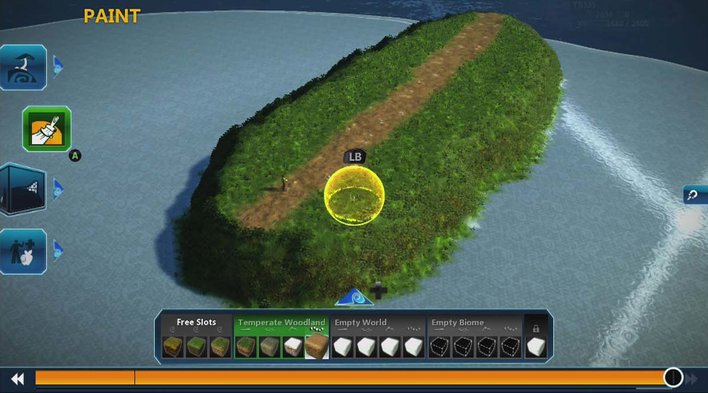
The yellow circular ball you see is the cursor - in this case, it is currently set on the Paint tool.
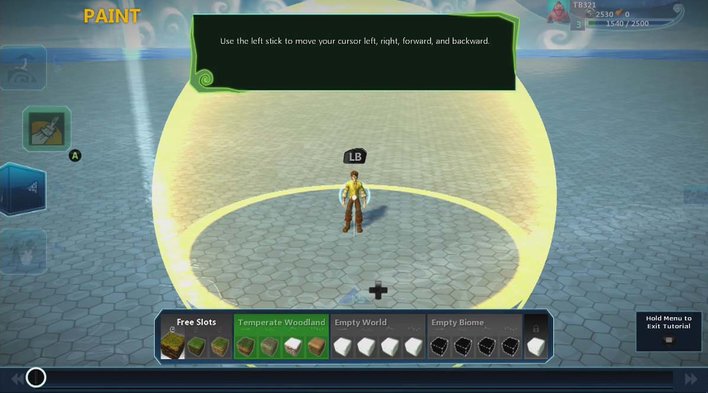
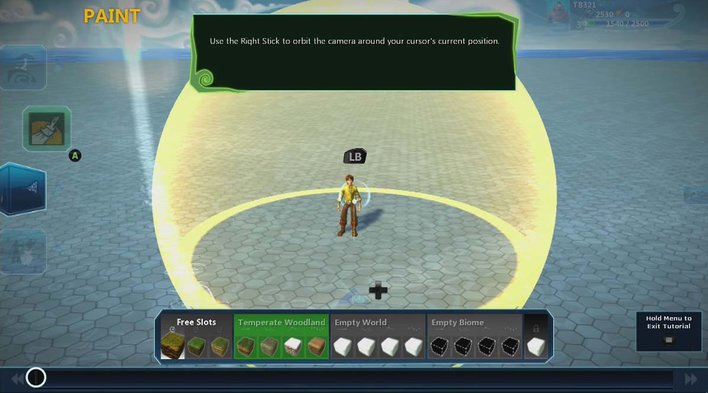
The game will give you a quick tutorial on how to move and control the cursor and camera; the cursor is the big yellow sphere that's currently around the character and is controlled with the left stick. The camera can be rotated using the right stick, or 'orbited' as the game likes to fancily put it, around your cursor so you can see everything easily. You can also zoom in and out with the camera by clicking in the right stick - there's a close, medium and far setting, and you cycle through them in that order with each click. We'd recommend leaving the camera nice and close up for the time being so you can clearly see what you're doing, but go with whatever zoom setting works best for you.
You can also control the height of the cursor by pressing X to make it go down, and alternatively you can press Y to make it go up. Nice and simple!
If you've ever played a game before, you shouldn't have too much trouble finding your way around the camera controls, as it's all very standard stuff. Once you're ready to move on, we can get stuck into making our game proper, by giving old Bert a land to call his own.
Making Mountains
Okay, so we can move the cursor around using the left stick, look at it from different angles using the right stick, and control it's height in the game space by using X to go lower and Y to go higher. Let's use our newly acquired giant yellow cursor ball skills to make some mountains!
Press the A button - this will extend the PAINT tool side bar on the left hand side of the screen. We will do some painting soon, don't worry, but first we're going to make some land to put our paint on. Press down on the d-pad/left stick once to highlight the SCULPT toolset, and press the A button on Expand option (the first option in the Sculpt menu)

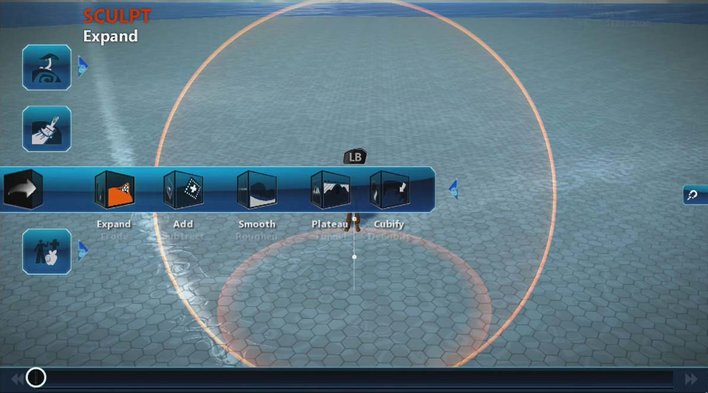
The cursor will now change to a clear circle with an orange outline, to show that we're currently in the SCULPT toolset. The Expand tool lets us use the cursor to raise the terrain by holding the right trigger, and lower it using the left trigger. Holding the left bumper brings up the Expand edit menu, lets us alter a few other settings to tweak how the Expand tool works. Scale changes the size of the cursor's area, Shape changes the shape of the cursor (you can choose a square shape or cylinder as different cursor shapes) and Intensity controls how subtle or extreme you want the change in terrain to be. You can move between these variables by keeping the left bumper held and using the d-pad or left stick, adjusting the values by pushing the right stick up or down. Thankfully, from here on in, things get a bit more exciting.
Press the right trigger to create a raised area of land; we want a fairly large area to use for our game, so I'd recommend tweaking the Expand tool's edit menu settings to about 40% Scale and 80% Intensity. Don't worry about Bert in the shirt, he's a tough little fellow and will be fine if you move terrain around under his feet. Pressing the left trigger lowers the land, letting you craft a landscape of your choice - mountains, valleys, canyons, you name it! Don't forget you can click in the right stick to cycle through the three zoom modes so you can get a good look at your landscape at different distances to get a sense of its size and scale.
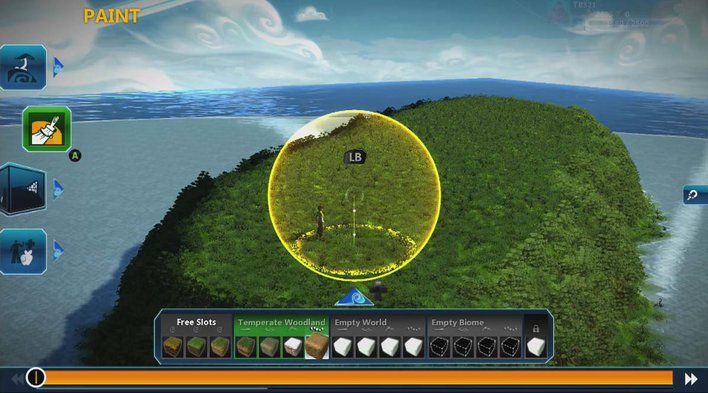
Keep on using Expand by pressing the right trigger until you have something that looks roughly like the picture below - for simplicity's sake, let's make a basic long strip of land on which to build our game. Don't worry, it doesn't have to be exactly like the picture, feel free to use your imagination if you want to design a different area of land.
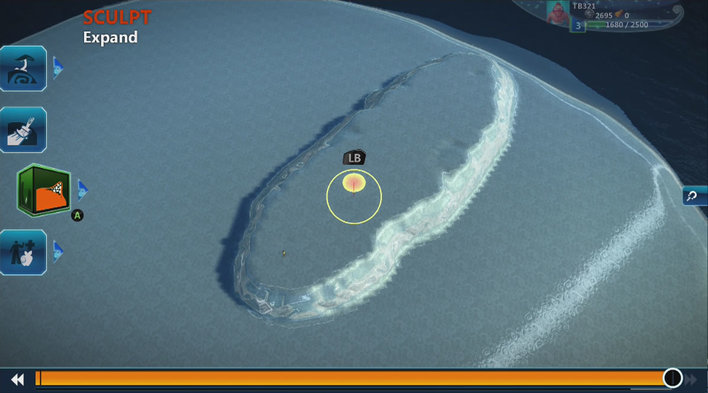
Make a nice big long strip of land
Also, don't worry too much about mistakes - Project Spark allows you to quickly go back and undo any errors you've made by pressing the View button (the little black button with what looks like two windows on it on your Gamepad, near the left stick), so you can quickly undo a wrong move. Whenever you make an action, a coloured bar will appear at the bottom of the screen. The colour of the bar signifies the type of actions you're making: Orange signifies actions performed using the Sculpt or Paint tools, green represents actions made using the Biome tools (the topmost toolset, used for putting vegetation onto your created landscapes) and actions taken using the Prop toolset (used for putting items into your game world) appear as blue on the bar. We're currently using the Expand tool which is part of the Sculpt toolset, so the bar is orange to match the orange Sculpt colour scheme.
You can keep pressing the View button each time you want to go back and undo your steps in order, or you can also hold the View button and move the right stick jump backwards along the orange bar to edit out your mistakes instead.
Once you're happy with your newly created chunk of land, it's time to get your paintbrushes ready as we're going back to Paint.
Painting and decorating
Right then, we've got a nice big slab of land on our screens, now it's time to slap a nice coat of paint on it...and by paint I mean a coat of lush green vegetation, not your regular tin of Dulux.
Press the A button and then press up on the d-pad/left stick to go back to the Paint tool, and then press A again to select it. This will bring up the Paint palette menu at the bottom of the screen, directly above the orange undo bar, and your screen should now look a little something like this.
The Paint tool palette menu - note the middle box in Free Slots (the left most category) is selected as the current paint.
Press right and left on the d-pad to select what sort of foliage-themed 'paint' you'd like using the little glowing white cursor in the paint menu at the bottom of screen. For our example, let's go with the nice grassy looking second paint choice in Free Slots, as shown in the picture above.
All that's left to do now is to raise our cursor (if necessary) so it isn't either totally buried beneath or hovering on top of the ground, and hold the right trigger while moving the left stick to paint your strip of land a nice leafy green with the cursor. You can also bring up the edit menu for the PAINT tool by holding down the left bumper and tweaking the variables for the tool in the same way we did for Expand; with left bumper held down, move between the options by using the d-pad/ left stick, and increase/decrease the value of the selected option by pressing up or down on the right stick. Pressing the left trigger will 'unpaint' an area, so you can revert any areas you aren't happy with back to the default icy blue if you'd prefer.
You should now be the proud owner of a lovely green strip of land like the one shown below. Again, not to worry if yours is slightly different; as Bob Ross often said, we don't make mistakes, just happy accidents.
Note the paint selected for the path is the fourth choice in Temperate Woodland section of the PAINT palette.
Before we move on, let's paint a path from one end of the island to the other for our hero to travel on. Let's select the fourth paint in 'Temperate Woodland' as nice rural-looking choice of path,
Your grassy island, complete with a weather-beaten path, should look something like the screen below; again albeit with your own personal little quirks and artistic flourishes of course.